PoP; Meeting with tutor, Cheryl Huntbach, via Zoom, 4.8.21

Very useful conversation around sketchbook use, which I had been struggling to build into my practice in Painting, having found it invaluable in Drawing. Suggestions:

  • Exploration of composition
  • Studying qualities of lighting – could be almost diagrammatic – to help inform my choices
  • If using oils, can still work in the sketchbook, use cling film or cellophane to separate pages
  • Could work on pieces of card for exploratory work, once dry put it in sketchbook and annotate with notes and reflections
  • Try working in series – cropping, playing around – lots of exploratory, provisional work
  • Always carry a sketchbook, even if you just use it to mark make- this way you build up a vocabulary of marks
  • Allow yourself to be drawn to things and just record that, maybe with what you think attracts you, e.g. texture or colour incidence.
  • Be a visual and material magpie!
  • Also, by getting back into using a sketchbook, it helps to re-establish your practice and commitment after a break.

Tutor also recommended taking part in online workshops and group meetings.

We set up provisional dates for assignments:

Assignment 1 – 29th September 2021

Assignment 2 – 24th November 2021

Assignment 3 – 9th February 2022

Assignment 4 – 20th April 2022

Assignment 5 – 29th June 2022

Painting 1 (UPM); Part 5; Notes on advice from Anna and Fiona

WHAT?

As part of my feedback on Part 4, my tutor suggested I contact two other students (Anna and Fiona) more experienced in colour mixing than me currently, and ask them about their starting palettes.

SO WHAT?

Both were extraordinarily generous with their knowledge and their time, sharing blog post links and offering a huge amount of information; some nuggets are listed here:

  • “I like brighter palettes, so I often take Ultramarine Blue as my blue, Alizarin as red and Light Cadmium Yellow as yellow instead of Zorn’s muted colours. It is important not to overdo with bright colours. Bright colours look better when there are muted colours around them. For this you can use the same red, blue and yellow to get muted colours.
  • For example, I take Light Cadmium Yellow and I paint a yellow daffodil. To make this yellow really bright, I do not put purple (Ultramarine and Alizarin mix) around this yellow. What I do instead is I add to my purple (which is a mix of Ultramarine and Alizarin) a bit of yellow (Light Cadmium Yellow) to make my purple duller (two opposite colour will give a grey but with a lovely tint – blueish grey, or pinkish grey, greenish grey and so on.) Purple in dull grey will be fighting for its survival as it is opposite to yellow (in daffodil).”
  • Look at: youtube Quick Tip 275 Luminosity, the channel is In the Studio Art Instruction – when you watch, make your own demonstration with explanation on a piece of paper.
  • “when you choose your set of blue, red and yellow to mix, you need to keep some things in mind.
  • For example, Ultramarine blue has got a bit of redness (because it has got a blue pigment and a violet pigment in it). That’s why when you mix Ultramarine with yellow to get green, green is never bright but blueish. I think, what happens is the red in violet pigment makes orange when mixed with yellow, this orange is opposite to blue pigment. So we have two opposites which make grey when mixed.
  • Sometimes, extra pigment in a colour helps create another colour.
  • Have a look at the video “Paint Blue Without Blue Paint” on youtube by Cesar Cordova. He uses Green and Violet, I guess green kills red, and the blue is left…. But this video just shows how important it is to read pigments in a colour when mixing with another colour (they are written on a paint tube).”
  • “Try to find some time and make little pieces of paper and mix different sets of blue, green, yellow and any other combinations, (first write on the back what colour you are going to use, or you’ll quickly forget), a mix for a piece of paper. It may sound like a waste of time, but it will help you enormously. When I do an exercise, I do not need to guess what colours to mix, I just look at my prepared mixes and choose, I call them colour cards.”
  • Copy paintings of a favourite artist – not in detail, but to try and match the colours and learn from their palette (I have made a start on this with my look at Sickert – see separate blog post)
  • “When you need to apply, for example, purple, try not to mix red and blue fully, but apply then so you can see some bits of blue and some bits of red paint on the canvas. Because then red and blue will mix to make purple in a viewer’s mind instead, and this always brings some life, more interesting.”
  • “I normally start with a mix of red, blue and yellow like in Zorn’s palette, but eventually I add other colours which are brighter, just remembering that there should not be lots of bright colours, a little bit of bright next to muted colours. No very dark or very light, tonally many colours are close to each other.”
  • Find a palette you like and stick with it for a while, but be on the lookout all the time for colour combinations you like.
  • The colour wheel is always useful.

NOW WHAT?

  • The “bright colour shown off by a muted surround” principle, and how to go about it, is a clear thing I need to learn.
  • My immediate situation (learning to live with and care for someone with a severe disability) is making embarking on a painting seem a bit epic at the moment; Fiona and Anna have reminded me that not everything needs to be a finished work – I can play around with things like colour cards, and jotting notes and colour patches in a sketchbook. I have rather lost sight of a working sketchbook; I have many around the house which I grab for Zooms etc, but it’s all random, whereas in Drawing 1 I really benefited from having a sketchbook that I worked through sequentially and could immediately lay my hand on what I wanted. So…..colour cards and an ongoing sketchbook.

St. Ives School of Painting – 21.3.21 – Saturday Life Live with Alice Mumford – in the style of Matisse

WHAT?

 This was a two-hour online session of life drawing with a live model, based around the work of Matisse. Alice had arranged for a patterned and striped setting, and the model had a vibrantly striped dressing gown throughout.

SO WHAT?

We were encouraged to work with a stick from the garden (I picked a couple up in the woods on my walk this morning) and black ink on cartridge paper. Alice suggested each time before beginning that you run your hand over the blank page, mentally placing the main features of the drawing, and that you start with the point of greatest interest to you.

She explained that the way the shapes break up the various patterns defines the space – so perspective is not such a focus, you can still explain to the viewer where things are in relation to each other; but it’s important, if you’re going to use pattern for this, to follow the pattern through so it’s clear what is behind/in front of what.

NOW WHAT?

  • It’s easy to forget how much fun you can have with ink and a stick! – although this was a very concentrated session.
  • I am guilty in my life drawing of focusing on the figure to the virtual exclusion of the clothing, background and setting – but today I have learned a different way of drawing a figure, by focusing almost completely on pattern. It feels quite risky! – but that’s down to the unfamiliarity.

2Bornot2B life drawing session for OCA, 10.3.21

WHAT?

This was a two-hour life session with a model from Brooklyn holding (excellently) a wide range of poses which allowed us to move from 1 min poses, to 2 min, etc, ending with three 15 min poses.

SO WHAT?

I worked in an A3 sketchbook; some of the pages already had random designs on them in acrylic paint where I had cleaned off my roller after some printing. I had also on this day been playing around making egg tempera; I had a small amount of black paint left and I knew that it was not recommended to keep this for use from day to day, so I diluted it with a lot of water in a jar and used it as ink, applied with a rigger.

A great, very concentrated session with an experienced model able to offer a huge range of poses – thank you 2Bornot2B and OCA!

NOW WHAT?

  • I now know that, if you dilute egg tempera enough, you get an effective ink
  • Drawing with a brush stops you fiddling and makes you commit

St Ives School of Painting, 6.3.21 – Chiaroscuro, with Tom Rickman

WHAT?

This was a two-hour practical session; we looked at a few examples of paintings demonstrating chiaroscuro, considering in particular the position of the light source and identifying where the light fell. We used charcoal on paper (I used ordinary willow charcoal in an A3 sketchpad, using a putty rubber to lift out), and worked on several poses of varying length held by a live model in a scene lit only by two candles.

SO WHAT?

There was so much to do in the time available for each drawing, and Tom modelled a process of drawing the basic forms first, then adding the really dark tones, and then developing a range of tones on the model and artefacts to describe form. I found it very challenging but was glad to have had a go, although the outcomes are not the greatest drawings I have done – but an effective exercise for making you think about light sources and tone.

NOW WHAT?

  • This exercise was really good for making one understand the benefits but limitations of willow charcoal – the darkest dark you could get on this surface was really the first mark you made, adding more didn’t seem to add darkness.
  • I think I should have tried Tom’s technique of “drawing in” the darks rather than shading the dark in with the side of the charcoal – there just seemed so much to put in! – but he did achieve a darker dark, more pressure I suppose.
  • It would be interesting to try out this chiaroscuro technique using ink.

St. Ives School of Painting – 4.2.21 – “Ways of Abstracting” with Liz Hough


WHAT?

This was a one-hour webinar presentation and demonstration.

Liz had her own “abstractometer” which is a continuum all the way from ultra-realism to complete abstraction.

She talked first through ideas worked out with other students over the years about abstraction and what it was, and illustrated each idea with a range of artists’ works. Abstraction involves:

  • freedom of colour and shape
  • Taken from nature
  • Deconstructing

She then went on to demonstrate a task which she suggested we try at home, which had several steps, but would enable us to begin abstracting a famous painting.

SO WHAT?

Knowing absolutely nothing about abstraction, I was very keen to seek enlightenment via the task, and I followed her steps to the letter:

  • Select an image which you like, with some fairly distinctive bright colours. I chose a painting which I had seen at the Kelvingrove Museum in Glasgow a couple of years ago in an exhibition of Scottish colourists:

FCB Cadell

“The Orange Blind”

c.1928

Oil on canvas

Glasgow Museums Collection

  • You can have four colours – two should be white and Payne’s grey, and the other two are your choice – I used gouache, and had titanium white, natural grey (didn’t have Payne’s), flame orange and viridian.
  • Make four painted coloured studies of all/any part of the painting, noting which parts attract you – colour/shape/texture? I found myself most drawn to the figure on the chaise, especially the hat, the blind, the chandelier and the painting on the wall on the left. Here are my four quick studies:

Next make at least four drawing studies, one each in pencil, charcoal and ink, and one in all three.

Next, put the original image and the painted studies away, and make a 5-line drawing (ie. literally a drawing of five lines) from each of the drawn studies:

This makes you really look at the drawn studies and pick out the most important bits to you.
Lay out your five-line drawings and your painted studies, and try to pair them up as seems best to you. Then, for each pair, combine them to make a final painted/drawn image – these are your abstracted images.

NOW WHAT?

  • I feel that I have had a bit of a eureka moment and have begun to have some small understanding of what abstraction can be
  • It has been revealing to see what aspects of a painting attract me – seems it is shape and colour
  • I feel the final pieces all refer clearly back to the original (least being the second, which is missing the hat & negative space head, along with the scroll of the chaise)
  • It’s a long process, but I can see that each step plays a different part. I should like to try it again – I think it might make for an interesting take on a tondo of a domestic interior!

St. Ives School of Painting; with Alice Mumford – life drawing in the style of Seurat

WHAT?

This was a two-hour session with a live model. Alice recommended trying to see Seurat’s small drawings in the National Gallery. We had four poses based on the Bathers in Asniere, 1884, oil on canvas, National Gallery.

SO WHAT?

We worked to three rules for this session:

  • Make a tonal range every time – should always start a drawing with this – use the colour of the paper as one of the tones
  • We used graphite sticks, 4B and 6B, on their sides to make blocks of tone
  • Using textured paper (we used NOT watercolour paper) – gives that slightly dotty effect, and also seems to hold onto the graphite better, so it is less likely to slide and smudge.

Here are my outcomes:

NOW WHAT?

Alice drew alongside us and was very good at talking through all her choices and decisions. I am going to try and take away some of her choices and try them out more:

  • Start with the thing that most interests you in the whole scene
  • Get the darkest thing in early
  • Getting things wrong and having to go in hard with the putty rubber and move elements around is OK

St. Ives School of Painting – 28.1.21 – “Understanding Composition – Top Trumps” with Alice Mumford

WHAT?

This was a one-hour webinar, a continuation of last week’s session on composition. Alice said that, if you thought about trump cards in a card game, they outshine everything else in the game, and that artists have techniques which they use in a similar way to make you look at what they actually want you to see.

SO WHAT?

Lighting: as an example she discussed Rembrandt’s “The Night Watch”, 1642, Rijksmuseum (which I am lucky enough to have seen, amazing). Apparently Rembrandt was commissioned to paint this group of people so he set them as a scene like this; the most important chap is front central, and your eye goes to him first because it looks for the point of highest contrast, which is his white ruff against the black clothing, and the eye is then led around the painting in order of decreasing contrast.

Line:  here we looked at Tintoretto’s “The Miracle of the Slave”, 1548, and traced our way around the painting in a rough figure of eight, starting with St. Mark coming straight down in the centre and a line leading more or less directly down to the other key figure in this busy painting, the slave lying on the ground.

As a combination of lighting and line we looked at Caravaggio’s “The Calling of St. Matthew”, 1599-1600 which, as you would expect, has some dramatic shafts of light against a chiaroscuro background causing some strong contrasts which help the eye move around. Also it is not immediately apparent which character is St. Matthew – until Alice pointed out a set of hands, virtually in a line, all pointing to the end figure!

Hats and eyes:  here we looked at a couple of paintings by Renoir, “Luncheon of the Boating Party”, 1882 and “Dance at Moulin de la Galette”, 1876. The “entry” point into both of these appears to be a character, or pair of characters, who are mid-ground and slightly in their own space, looking out towards the foreground, almost out of the painting. The way round the painting is then to follow their eyes, see whom they are looking at, where they are looking, and so on. One is also led to follow sets of matching hats around the picture; in the first of the above they all seem to be a matching bright yellowy/orange with blue ribbons which stand out and are really distinctive. In the second there is also the use of pairs following the colour pink (as discussed in the previous session).

The Golden Section: I hadn’t got to grips with this before and it might take a bit of practice!! To find the spot, fold one corner of a rectangle up to the edge and draw a line down to show the square; then fold the opposite top coroner down to the line to make another square – this leaves a rectangle. The two squares are static and the rectangle dynamic (see last session) and the point where they meet is the golden section, and this is where you want to place your key thing which leads the viewer in. Alice discussed this looking at David Hockney’s “Mr and Mrs Clark and Percy”, 1970-1, and Matisse’s “The Conversation”, 1908-12. Also, most of Ben Nicholson’s works use the golden section.

High Contrast: as well as being drawn to the point of highest contrast between light and dark, the eye will be attracted to contrasts in colour, which she illustrated by comparing and contrasting Ben Nicholson’s 1924 picture “First Abstract Painting, Chelsea”, c 1923-4, with Matisse’s “The Snail”, 1953.

NOW WHAT?

A lot to take in – was pleased I had remembered some of the points from last week (e.g. pairs) and could “see” them as Alice talked about them.

My takeaways from this session are going to be:

  • Think about that “high contrast of light and dark” point when I am building a composition of interiors in Part 4
  • Look at some paintings and try to spot the golden section.

St. Ives School of Painting webinar – “Understanding Composition – Static and Movement” with Alice Mumford, 21.1.21

WHAT?

This was a one-hour session where Alice set out some principles of composition, using and comparing a variety of works from an Egyptian statue right through to the present day.

SO WHAT?

  • Wherever your eye is drawn to first is where you enter the painting
  • Egyptian statue was symmetrical, and was an example of “static” with its powerful solidity; contrast the Roman statue in a natural pose, which was all about movement. She gave an example of Morandi’s “Still Life”, 1946, which combines static and movement by having a central static pot and then a range of others behind which make your eye move around.
  • Left to right: she worked through a comparison with works by Chardin and Klee, with their underlying structures akin to musical staves, which encourage the viewer to “read” the image from left to right as if it were music; contrast William Scott’s “White and Black Pot on a White Table”, 1955, where the big white pot bang in the middle dominates the picture – beware of the “ego in the room”!
  • Bottom to top: we looked at some Matisse examples – he went for a portrait layout, often with a “welcome mat” in the foreground at the bottom which drew your eye into the picture and then echoing shapes and colours of objects carry you up through the painting.
  • Repetition and narrative: your eye will pair up colours and shapes to create movement and reinforce a narrative – examples were Tom Roberts’ “Shearing of the Rams”, 1890, and also Brueghel’s “Hunters in the Snow”, which creates a warp and a weft (this can slow your eye down with its complexity – Alice suggested going to look at Bonnard and Vuillard who do something similar).
  • Zig-zag: examples of this were Claude Lorrain’s “Flight into Egypt”, 1666, and Turner’s “Caligula’s Palace”, 1831 – the proscenium arch effect, where you are led in a zig-zag from the foreground through to the background.

NOW WHAT?

I’d come across the “zig-zag” composition idea before but hadn’t worked through the others before; I’m going to:

  • Look through some art books and try to identify examples of each
  • I’m particularly drawn to the “repetition and narrative” pairing idea so I’d like to hold this in my head and try to actively use it

Painting 1 (UPM); Part 3; Zoom workshops with Hayley Lock – “The Garden of Earthly Delights”, Nov & Dec 2020

WHAT?

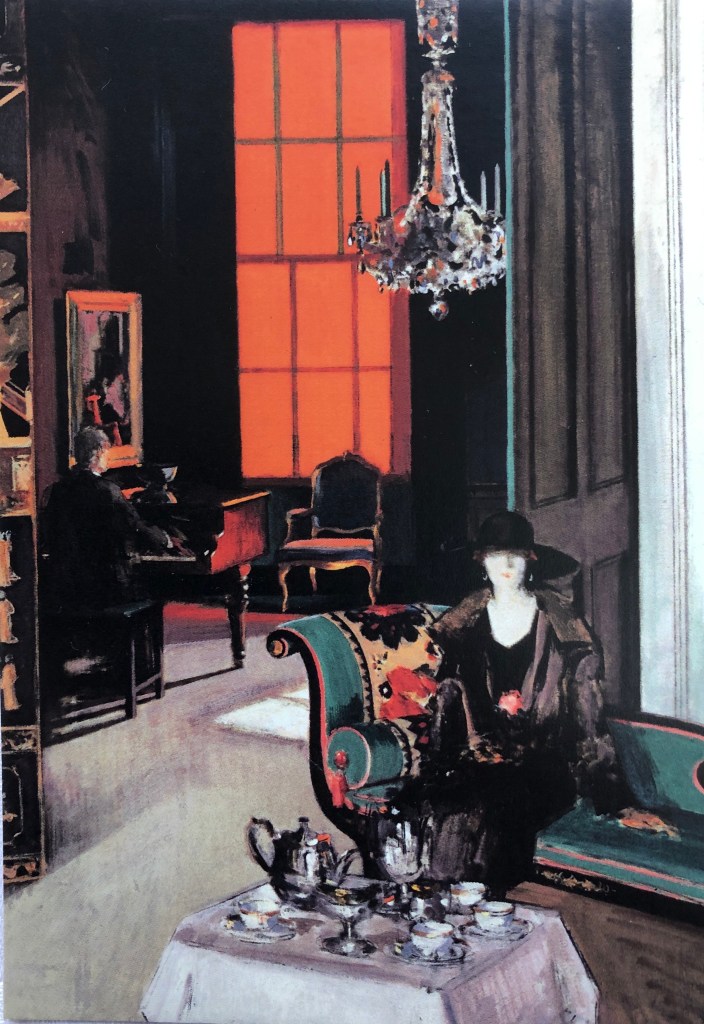
OCA tutor Hayley Lock led two Zoom workshops, a fortnight apart, focused on the triptych “ The Garden of Earthly Delights” by Hieronymus Bosch. In the first session we looked at the painting in some detail, and were also pointed towards other artists whose work featured gardens/plants/animals/the figure, looking in particular at aspects such as scale, colour, patterns and repeats.

We were placed in smaller groups and invited to work on a response to the presentation together for a while, and then continue with this in the gap between the sessions, communicating by Padlet.

SO WHAT?

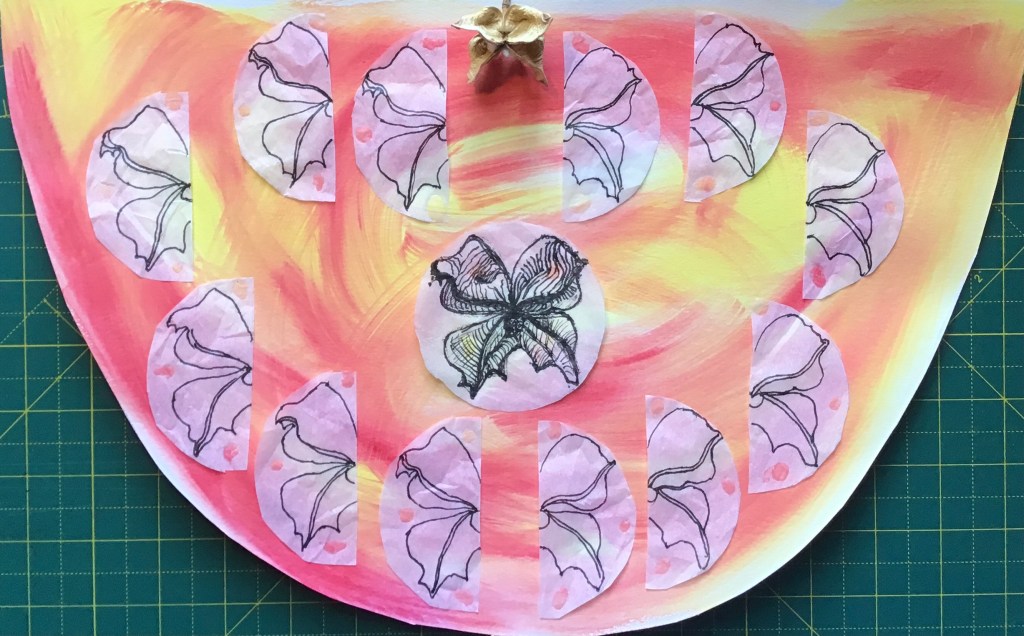
My initial “unthought-through” response in the group session using the shapes we had cut out within the session was to create a repeating pattern based on semi-circles.

I wasn’t overwhelmed with that – the background was all wrong apart from anything – but I was inspired by the session. I went away to look at Ernst Haeckel’s 1904 book (my copy being a 2019 reprint by Prestel Verlaine of Munich, New York and London) “Art Forms in Nature”, who was one of the artists whose work had been recommended to us, and is a favourite of mine.
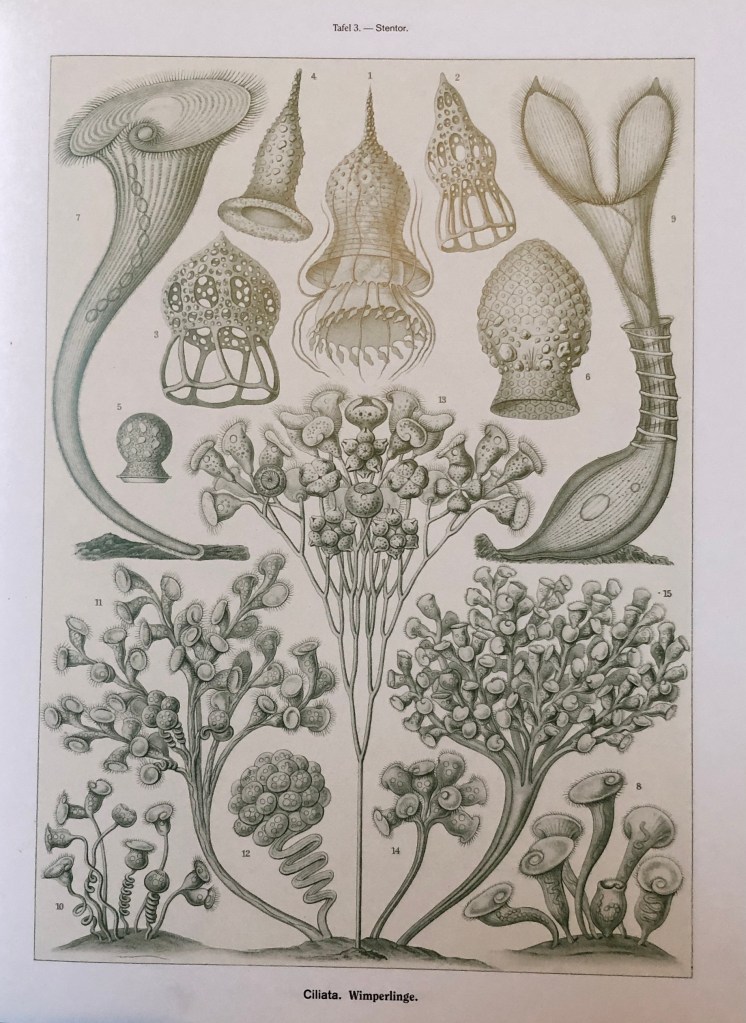
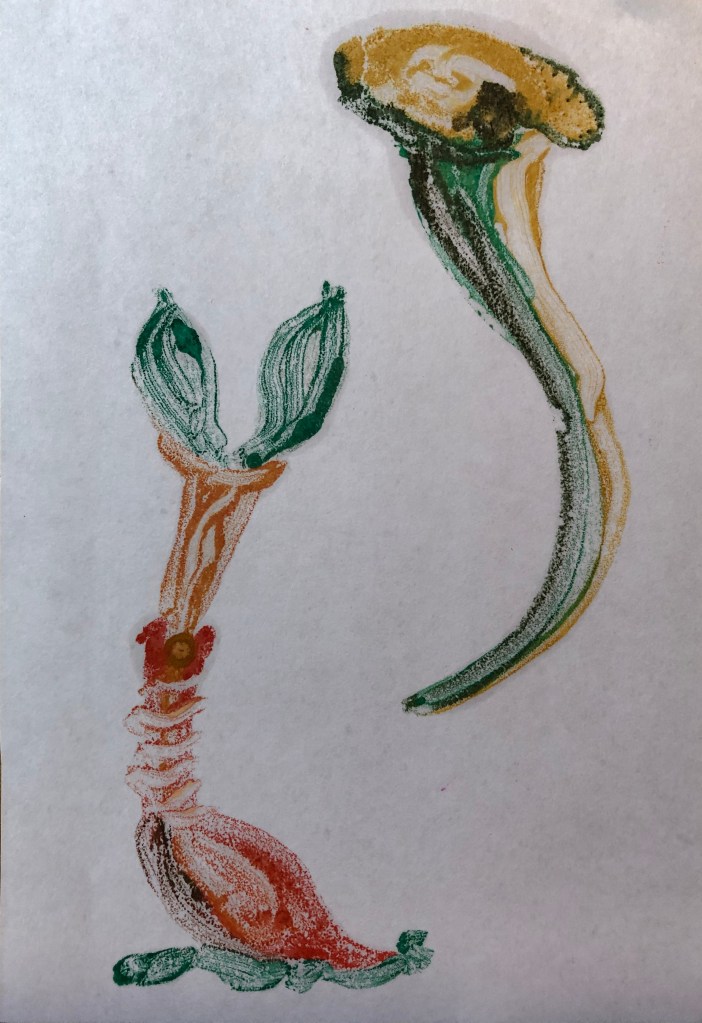
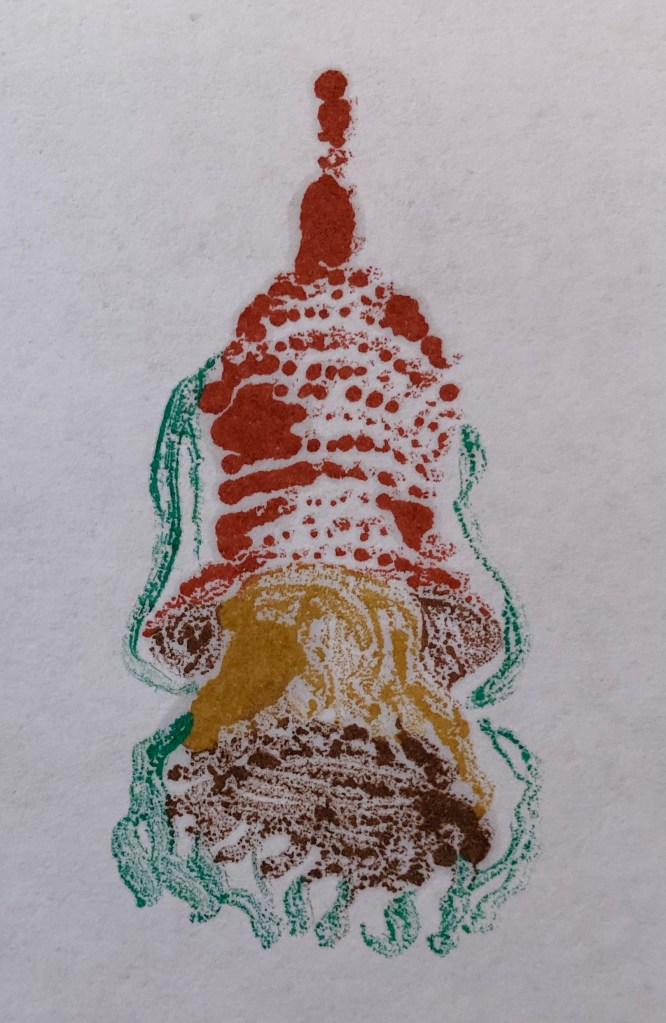
As I am just figuring out the process of monotype, I decided to have a go at some Bosch-like images to make prints of, inspired by the images on one particular page:

This was fun – didn’t really know what I was doing, used oil paint on glass with Zest-It solvent onto thin cartridge paper, trying different thicknesses of brush and varying marks. The process really does transfer the brushstrokes much better than I thought it would, and my attempts to add tone in the third image by having unbroken marks on one side and dotted marks on the other are at least a partial success – to be remembered……

I also thought the colour/pattern design aspect would lend itself to enamels, which I particularly enjoyed using in Part 2. I used Raqib Shaw’s method again of drawing some triangular diatoms (single celled organisms) from Haeckel, tracing them onto a small gessoed board which I had prepared with a matt black egg tempera ground, and drew over the tracing with gold acrylic liner. Once this was dry I filled in the diatoms with coloured enamels – I had no colour reference to work from, so just wanted the overall effect to be patterned, striking and shiny against the plain matt background. 

In the second session, the student groups took it in turns to show and talk about what we had done so far – my takeaway from this was the huge divergence in the artwork which resulted from a shared input.

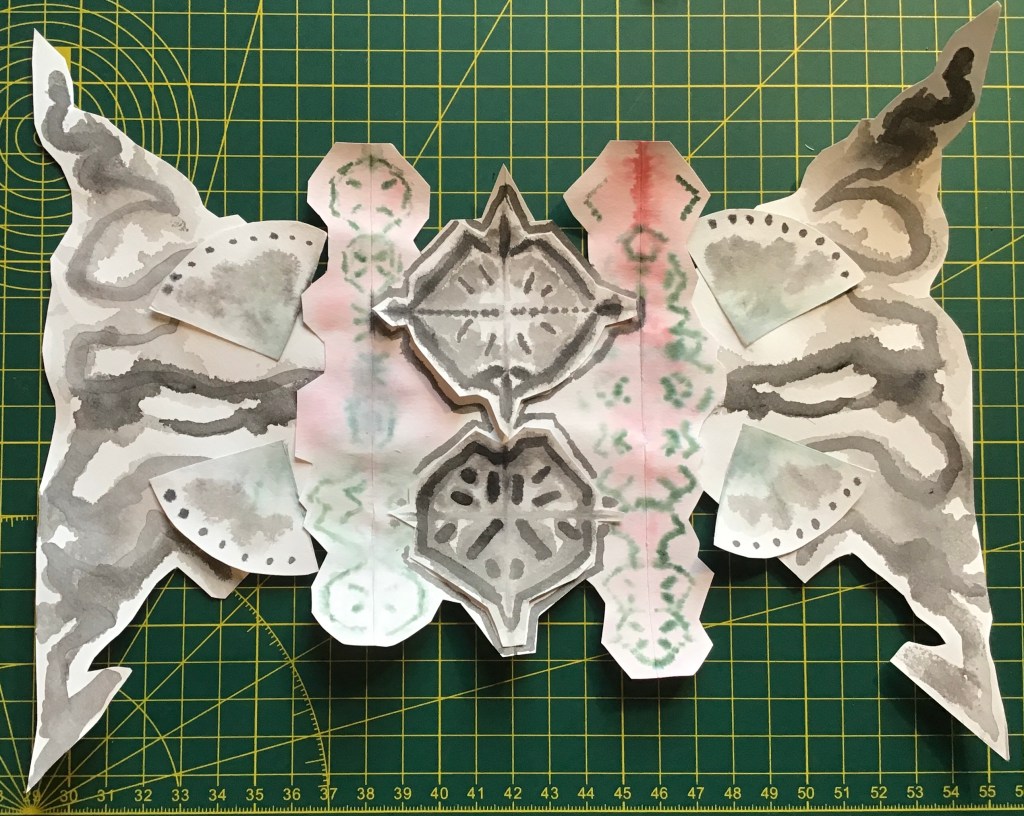
We then worked in the styles of Bruce Connor and Alexander Tovborg to create a potentially never-ending drawing based on gridded, folded squares and circles using the inkblot technique, cutting, joining, working into,  overlaying…..all based on careful observation of one natural thing and mark-making accordingly. Again, everyone’s was very different; I used two water-soluble felt pens, a lot of water  and, when these gave out, dilute black ink. Not sure what it was or where I was going with it, but it was fun.

As part of my background work on this topic, I had looked at www.botanicalmind.online and had been interested in the work of Philip Taaffe – see e.g.: (can’t seem to insert image, sorry)

Philip Taaffe, Lalibela Kabinett, 2008. © Philip Taaffe; Courtesy of the artist and Luhring Augustine, New York.

I suppose I envisaged the work I had produced as a result of these workshops to fit into a project a bit like this of Taaffe’s.

NOW WHAT?

A fanciful and a pragmatic takeaway:

  • Fanciful – I would have time to pursue and develop this investigation into natural forms and produce something in the style of Taaffe’s work – although making it my own
  • Pragmatic – To give myself permission to cut loose and play with form, design and pattern a little “just for fun”, even though it might not lead to anything finished.